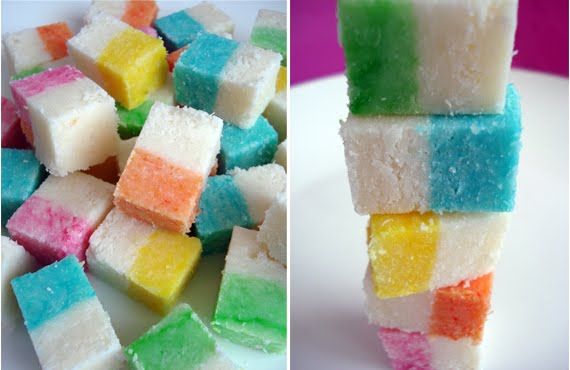
Here's the recipe:
1 14oz bag of coconut, dessicated (see below)
1 lb of powdered sugar, sifted
1 can of condensed milk
1/2 teaspoon of food coloring
To Dessicate Coconut:
Preheat oven to about 250 degrees Fahrenheit. Place the baking sheet with coconut shreds and bake for approximately 5-8 minutes. The actual baking time depends on the moisture content of the coconut meat and the size of the coconut shreds. You can check the coconut pieces if complete dehydration is achieved or not. Once done, the dessicated coconut is dry and crispy to touch. If necessary, you can bake for another 2-3 minutes to get the desired dryness. After it is dry and cooled a bit, grind it in a blender to achieve a fine powder.
To make Coconut Ice:
In a large bowl, stir the dessicated coconut, powdered sugar and condensed milk together until you have a stiff, sticky mixture. Remove half the coconut ice to a clean bowl and add the food coloring, then stir again until the color is blended in smoothly. You may find it easier to mix with your hands as the mixture will be very stiff.
Line a small rectangular dish with cling film, making sure there is plenty overhanging at the sides. (Later, you will fold these overhanging bits over to cover the coconut ice.) Grease the cling film with a few drops of vegetable oil. Take the white portion of coconut ice and pack it firmly into the lined dish, making sure you produce an even layer. Pack the colored portion into a neat layer on top of the white layer. They will stick together firmly, thanks to the amazing adhesive qualities of sugar and condensed milk. Fold the cling film over the top and refrigerate the coconut ice overnight.
When the coconut ice is nice and firm from the fridge, turn it out of the dish, using the cling film to help, and peel the film away. Chop into little squares (a serrated knife is useful here), dust with powdered sugar and pack in wax paper.
Recipe adapted from Gastronomy Divine
I just love this idea! Coconut ice in a rainbow of colors would be so pretty on a party table. I can just see it on skewers or even packaged up as a yummy take home party favor. It's the perfect way to coordinate party colors and enjoy a sweet treat, too.


4 comments:
Sounds easy and looks amazing! I've got a "confetti" theme in mind for New Year's this year (I like to play way ahead) and this would be perfect!!
So cute! So colorful! So many possibilities! Love it!
OMG those look so delicious - I think I would eat them all - I love coconut
So cute! So colorful! So many possibilities! Love it!
Post a Comment