
Hey there Shindig Peeps!
I am Kristyn over at Lil' Luna, and I'm happy to announce that I will be making a regular monthly appearance here on Shindig. How stinkin' FUN is that?!? I am so stoked because I love Amanda and EVERYTHING she does. The girl is amazing, and I love all the printables in her shop and all the FREEBIES she offers here on her site.
I am Kristyn over at Lil' Luna, and I'm happy to announce that I will be making a regular monthly appearance here on Shindig. How stinkin' FUN is that?!? I am so stoked because I love Amanda and EVERYTHING she does. The girl is amazing, and I love all the printables in her shop and all the FREEBIES she offers here on her site.
Just to let you know a little about myself...
I'm married to a VERY supportive husband who helps me with all my crazy craft endeavors.
I also have 3 kids under 3, and I LOVE them so much. They definitely keep me busy but they bring me so much joy! I also just moved into my first house and I cannot wait to start crafting and creating to make it a HOME. :)
Today I will be showing you how to make a
SUPER fun, BUT EASY Interchangeable Pennant BANNER.
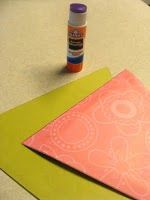
Here is what you'll need...

INTERCHANGEABLE PENNANT BANNER
SUPPLIES:
-Scrapbook Paper
-Glue Stick
-Sewing Machine
-Magnets
-Chipboard Letters
-Ribbon/Tulle
DIRECTIONS:
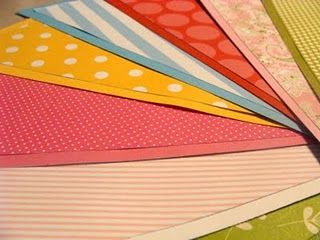
1. Begin by cutting out triangles in the size that you would like for your banner. I made a pattern out of cardstock for a 6" and 7" triangle. I wanted to make 9 triangles because the largest word I thought I wanted to make was CELEBRATE, so 9 six inch triangles and 9 seven inch triangles. :)

2. Trace smaller triangles onto the patterned scrapbook paper you chose, and then larger triangles onto the plain cardstock paper.


3. Glue triangles together and then sew a zig-zag stitch onto the triangles {this zig-zag stitch adds the perfect embellishment to the banner and makes it more durable!}

4. Hole punch triangles at the tops and string through tulle or ribbon.


5. Hot glue magnets onto your chipboard letters. And then place a magnet on the backside of the triangles to SPELL out the word you want to use. Do this with the rest of the letters for more words you would like to make. You can then INTERCHANGE the letters to display different words.


6. Hang and ENJOY your fun and easy Interchangable Banner!
I hope you like this fun craft.
Be sure to come over and say hi over at Lil' Luna.
Thanks for letting me take over today, Amanda!
ENJOY!
________________________________________
Thank you, Kristyn! What a fabulous idea and tutorial!
Be sure to visit Kristyn over at Lil' Luna and click her "like" button on Facebook, too. She's got so many neat projects and great tutorials - you sure don't want to miss out on any of the fun!

8 comments:
great banner thank you so much for sharing
ok first I had no clue you could sew on cardstock!!! Love this tutorial. Thanks for sharing it!
I LOVE Kristyn! So fun to see her over here!! Awesome banner idea!
Paula
That is a brilliant idea!! I love when I have multiple uses for the same thing! Makes all the work even more worth it! :)
www.howdoesshe.com
i love the sewing on paper. great idea!! I am happy to be your newest follower. Please stop by for book club if you're interested--connie, measuredbytheheart.com
That was an awesome tutorial Kristyn, I loved it. So practical, and way cute. So sweet of you Amanda to have her over every month. I'm sure we will all love her posts.
Have a great day girl, hope you are enjoying your summer!!
I'd also LOVE to invite you to check out my weekly parties. I would be so happy if you linked up, this and any other fabulous project you are working on.
Stop by anytime to say hello!!!
Hugs, Bella :)
**AMAZE ME AUGUST** @ Bella Before and After Any projects, recipes, diy welcome.
**PARTY PLANNING TUESDAYS** @ Euro Style Cakes. Any party planning tips, decorations, invitations, recipes welcome.
I love these pennants! Well done, love the blog too!!
Cute banner! And how fun that you two will be working together!!
Post a Comment